
So after the hassles fitting the roof light, it was time to turn my attention to insulating the roof, and fixing more tongue and groove wood to the ceiling of the van.
As was noted in the last blog post, the roof is buckled where a previous owner has walked across the roof. This meant I couldn’t use Celotex insulation panels on the inside of the roof (which is what I wanted to do)
So the way I got around it was to buy some recycled plastic loft insulation. This had the added benefit of moulding itself around the buckles and contours of the metal roof.
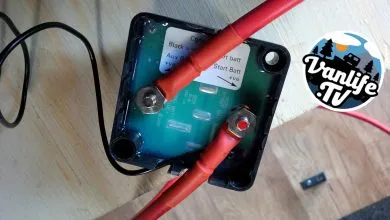
High temperature adhesive
I attached it to the roof with high temperature spray adhesive. It needs to be high temperature because the metal will get hot from the sun in the summer months, and you don’t want the glue melting in the heat.
It was really easy to apply, I just sprayed a section of the roof, and then cut the insulation to size, and it stuck first time! Simples! Below is a photo of the insulation stuck in place.

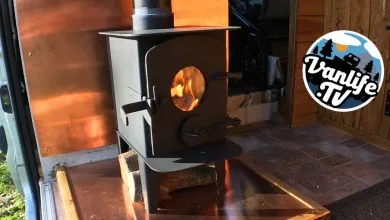
Installing the wooden roof
At this point I also had to come up with a plan for fixing the tongue and groove panels to the ceiling around the roof light. I ended up having to fix an off-cut of wood to the edge of the roof light, and then I could screw the tongue and groove panel into that. It all worked out just fine as you can see in the photo below.

Now that I had the roof light figured out, it was going to be a simple job of just screwing the tongue and groove wood onto the metal strengthening bars of the roof – or so I thought. Everything was going fine until I had to screw into the metal above the cab. There is some over cab storage in the van, but the height wasn’t enough to allow me to get my drill into it to put in the pilot holes. So it was off to the local DIY shop and I bought a right angled drill head. Take a look at the video to see how I got on.
With the right angled drill head making light work of the enclosed space, I soon had the first four panels in place. I then stained them up to give me and idea of how the whole roof might look when finished.

Now I had to turn my attention to the back of the van, and align the panels behind the roof light. I needed to make sure everything was going to fit before I committing to cutting the wood to size and fixing it in place. So I had a “dry run” and clamped the wood into place as you can see in the photo below. Once I was happy I cut the wood to size and fixed it to the roof.
The last few panels of wood were 3 metres long and ran the entire length of the van. They went in without too much trouble, and the finished result looks like this


The only part left to do is to the corner pieces, where the roof meets the walls of the van. I have intentionally left them out at the moment, as I am going to experiment with a few ideas on how to fix the wood into place. I might even change the wood style or add some fancy trim – I’m not 100% sure yet.
So they you have it. The job was straight forward as long as you plan out the way you are going to do it beforehand. It is definitely a two person job because of the length of the wood involved. If you have any questions, please put them in the comments below, or comment of the YouTube video.

Hi,
Just wondering what mm thickness cladding you used?
Warm regards, Kelly
Thickness of the cladding was 11mm. Got it from Jewsons.