This week things have progressed nicely with the campervan build. I have managed to get the wood effect vinyl floor in place, the bed is in and the tongue and groove panels are now on the rear walls. So with this video and blog post, I am going to show you how I got all the work done!
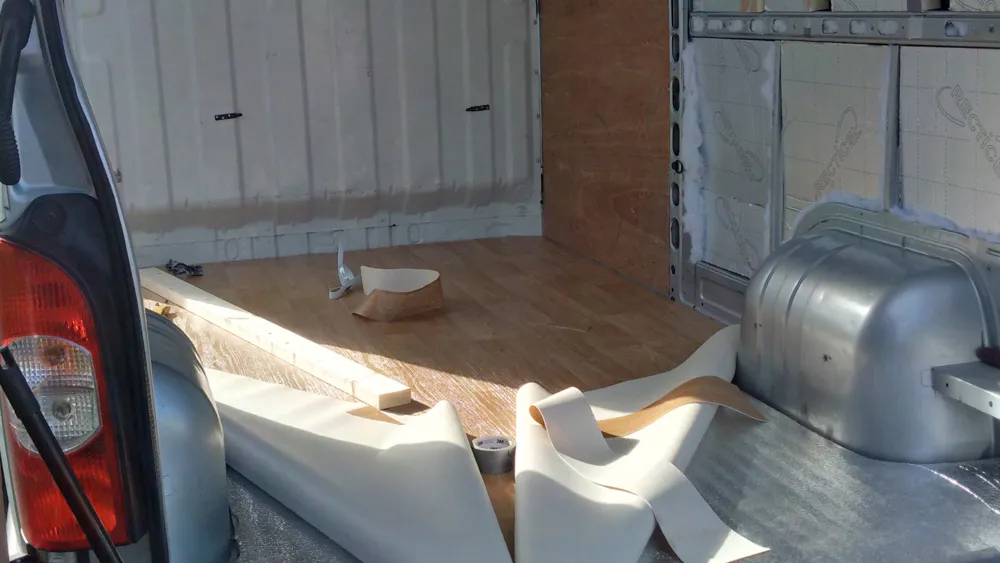
Before the build could start in earnest, I needed to lay the floor. Everything was going to be built on top of the floor so it had to be one of the first things I did.
So a quick trip to Carpet Right, and I bought some nice wood effect vinyl flooring. I would have liked a darker wood effect, but that’s all they had in at my local store. The cost was just over £60 to do the entire floor.
Laying the floor
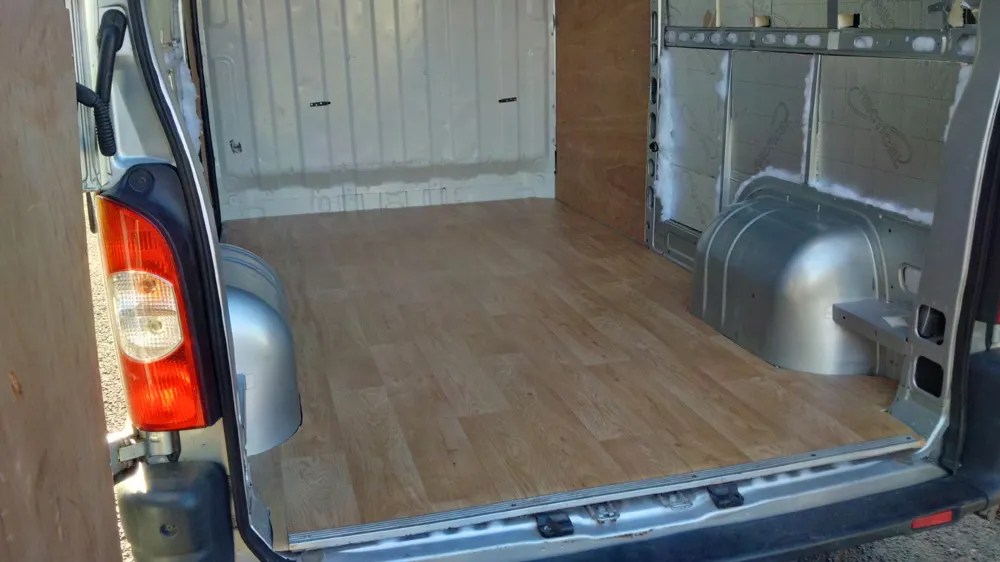
Laying the floor was straight forward. A Stanley knife cuts the vinyl really easily. Its just a case of taking your time. I chose not to stick the flooring down, and there is a reason for this.
If I ever have to lift the floor for some welding or maintenance, then trying to remove vinyl flooring that has been stuck down is a nightmare. My thinking is that once I have built the cupboards into the van, that’s what will hold it in place!
Building the bed
Moving onto the bed, my plan was always to have a raised platform for the bed, with lots of storage underneath for all my climbing and outdoor gear. I plan to sleep across the van, which is just about possible. The width of the bed stands at 1.75 metres, and I have made the bed 1.1 metres wide.
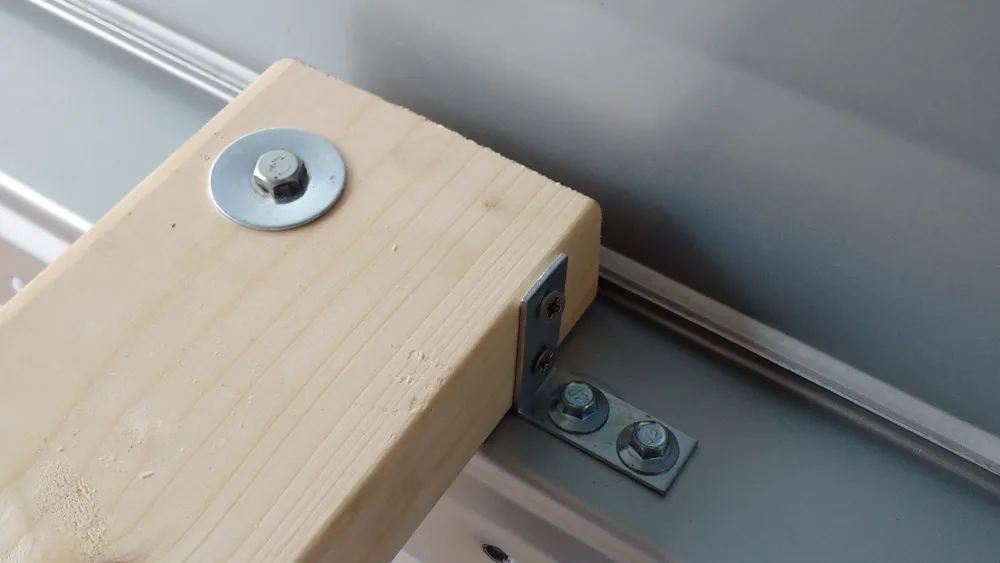
The first job was to attach the bed supports. I bought some good quality building timber from Jewsons, and bolted them into the horizontal metal strengthening members in the van sides. I also used a metal angle piece screwed and bolted into the front of the wood to help brace the wood in place. See the pic below to see how I did it.
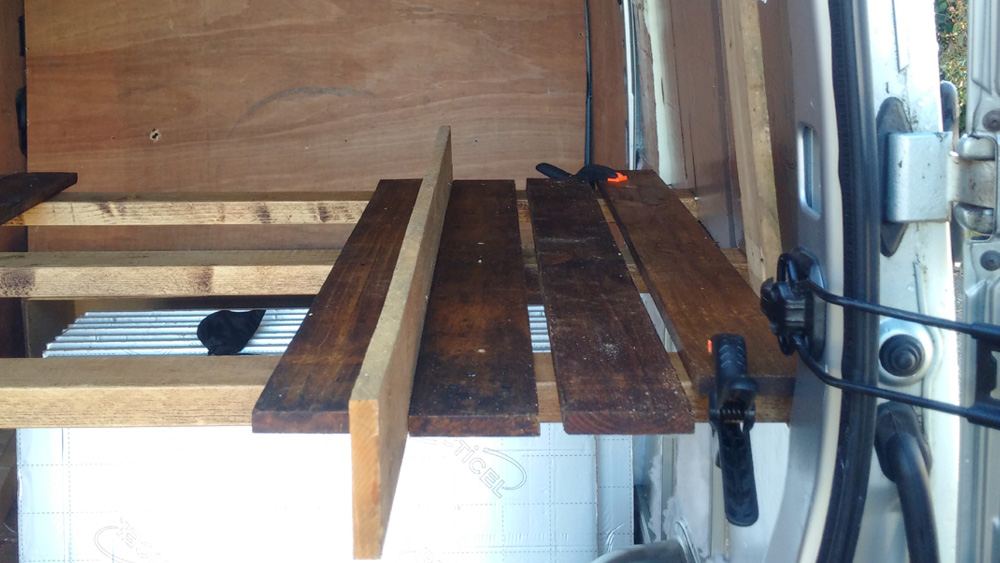
Now it was time to fit the slats onto the bed supports. I had originally planned to use plywood, but I would have had to have bought this. I then struck on the idea of using reclaimed pallet wood which I can get for free from my friends work. This turned out to work brilliantly, and also has the bonus of letting the air circulate underneath the mattress.
To prepare the pallet wood I just sanded it down and then gave it a coat of Briwax. I then fixed the slats onto the supports with screws. I used another piece of pallet wood to get uniform spacing between the slats, as you can see in the photo below.
Installing the side walls
Turning my attention to the side walls, I was originally going to use the existing ply lining that came with the van. At the last minute I changed my mind and opted to go for pine tongue and groove panels.
I looked at the tongue and groove wood at my local B&Q, and it wasn’t great. It was very thin, and the overall quality of the wood wasn’t great – which is probably why it was only about £6 for a pack of 5. So off I marched to Jewsons, who sold much better quality tongue and groove panels. They were thicker, the panel was much larger, and they came in up to 3.6 metre lengths. However the cost was about £30 to do one side wall.
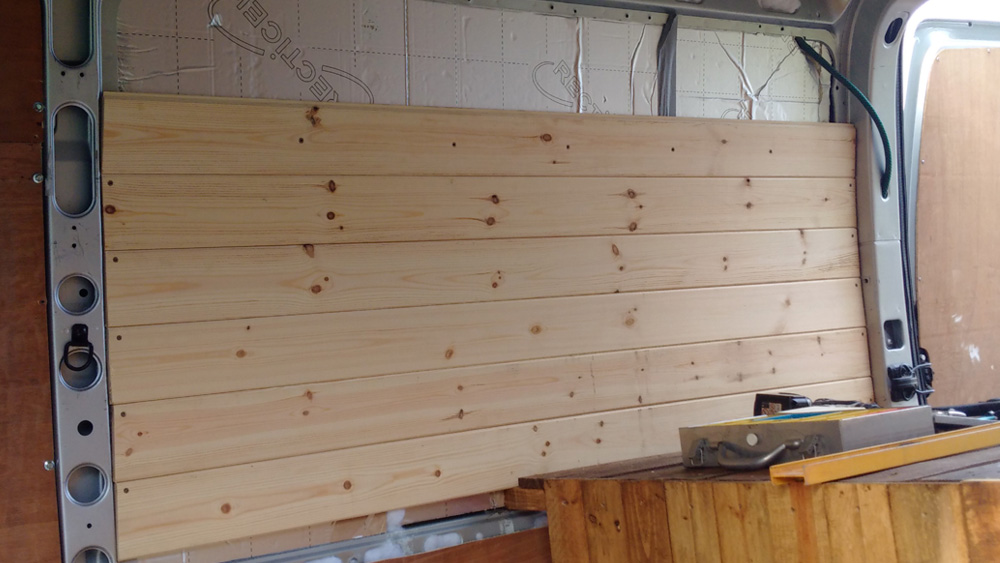
In the end I opted to spend more money on the better quality wood from Jewsons. I fitted it by drilling into the recessed metal work of the van. The lip is recessed slightly to allow ply lining to be fitted, and it works equally well with tongue and groove.
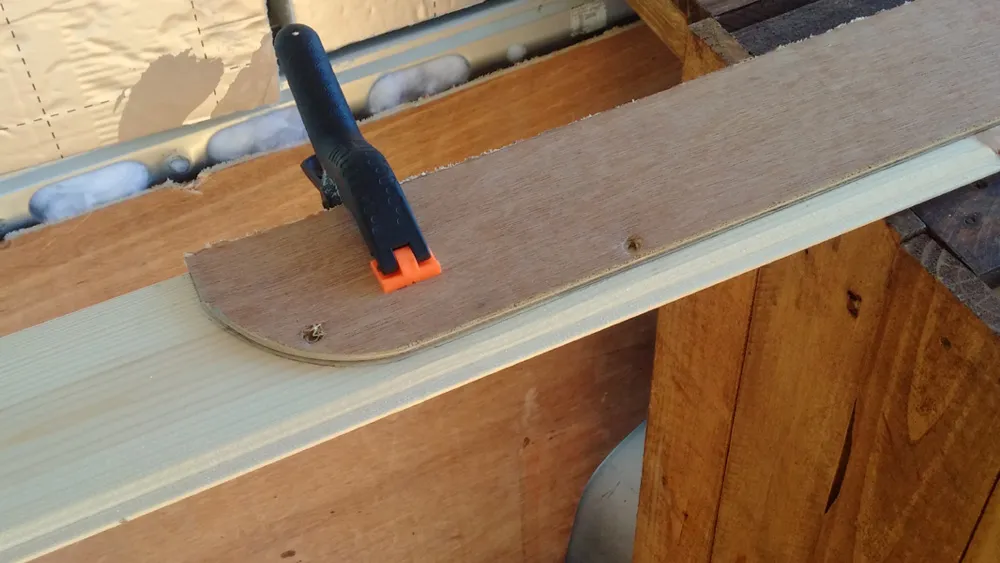
I used the ply lining as a template to cut the tongue and groove panels so they fitted exactly in the right place and followed the curves of the van. You can see in the photo below how I used the ply lining as a template.
Staining the wood
The final job was to stain/wax the pine panels with Briwax. I had used “Dark Oak” for the pallet wood on the bed, and I thought it would be too dark on the walls. So this time I used the “Rustic Pine” colour which gives a nice golden colour to the wood.
The instructions on the tin say to apply the wax with a cloth. Having done some experiments on offcuts of wood, I found that by applying it with a brush you get small build ups of darker wax in the grain of the wood. I quite liked this effect, so brushed it on, and then lightly wiped it over with a cloth at the end – but not too much that it polished up the wood.

So there you have it. The back end of the van is starting to come together nicely. I have a few things left to do to the back end and then I can turn my attention to the front living area of the van – but that’s for another post!
If you have any questions, leave them below.